I built a turntable for Die Keinnamebahn and electrified it using Peco NB-55 n-gauge turntable kit and a 10rpm geared motor, worm and gear obtained from China, via eBay. I had to build my own gearbox frame from strip brass, no easy task for this amateur metalworker! The installation worked but I wondered if there was an easier or more elegant solution.
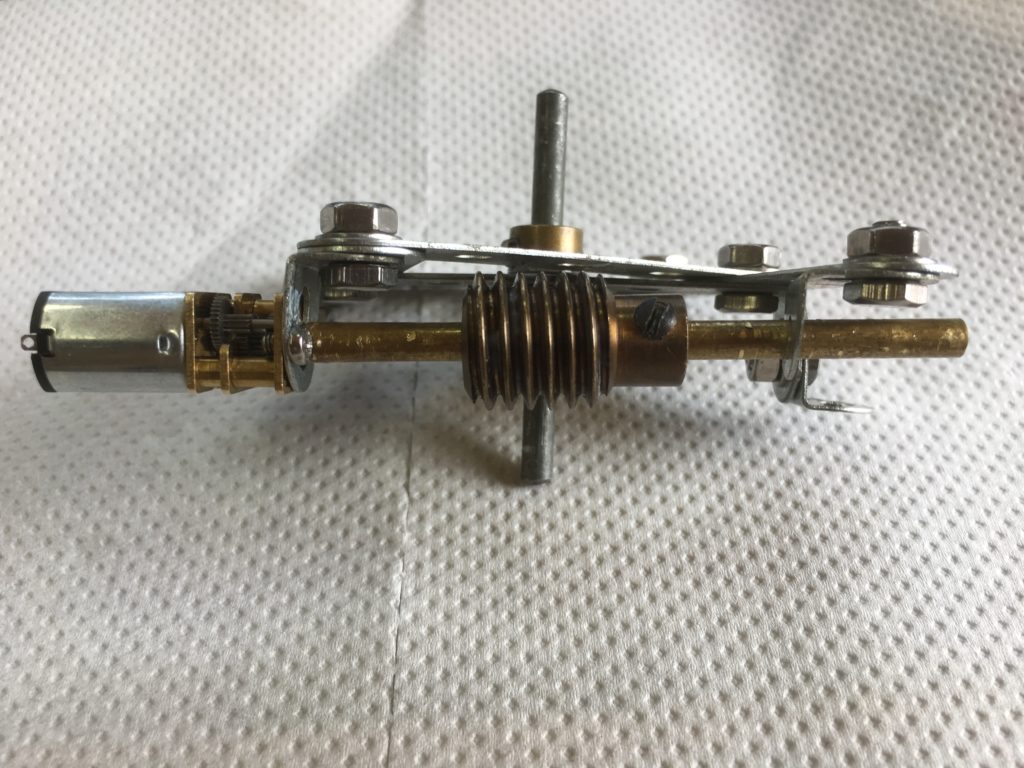
The Peco NB-55 turntable is designed to take a Meccano 4.06mm (8 SWG) rod as an actuator. I had a damaged Peco LM-55 n-gauge turntable and some old Meccano, which included a few gears, and so I experimented at designing a turntable motorising system that is inexpensive and uses a £3 – £4 geared motor as before.
Because the Meccano gearing is different to that I which I used on Die Keinnamebahn I have chosen a 40rpm 6Vdc geared motor rather than the 10rpm type. The original plastic gear had 32 teeth and the Meccano gear is a 50 tooth gear of finer pitch.
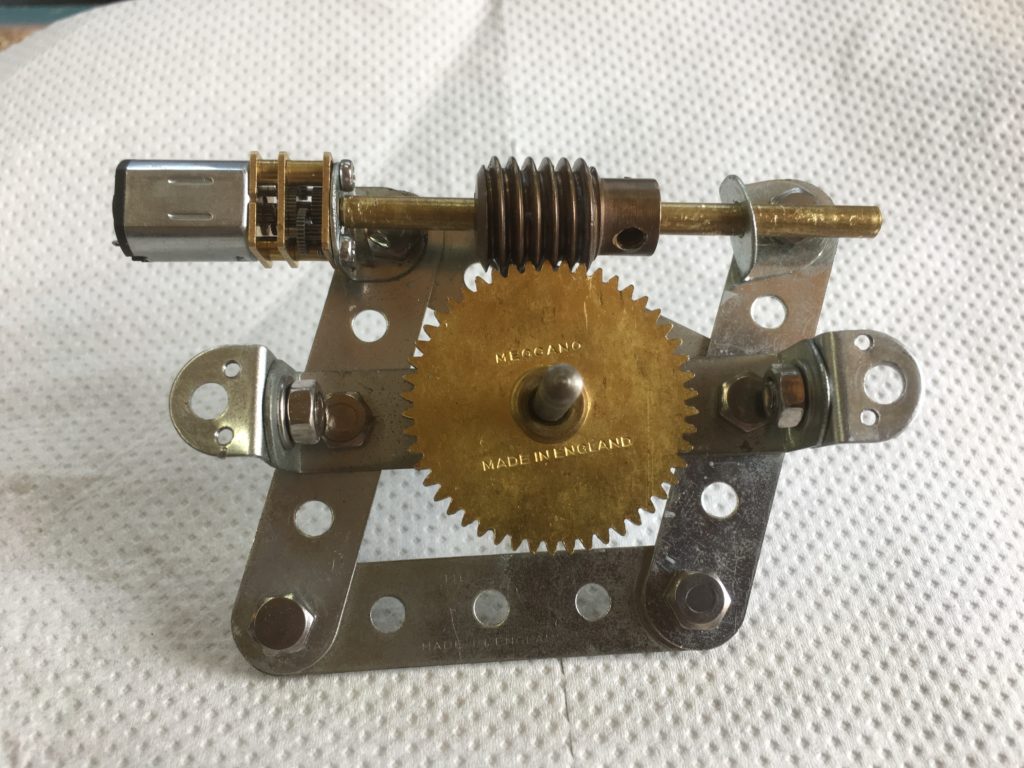
The parts list I used is:
Meccano Parts:
- 1 x No.32 worm gear with grub screw
- 1 x No.27 Spur gear 50 teeth ( 1 3/8” diameter) with grub screw
- 3 x Standard brackets
- 1 x No.48a 1x5x1 Double angle strip
- 4 x Standard strip 5 hole
- 1 x No.11 double bracket 1x1x1 or
- 1 x No.6a Standard stop 3 hole (bent to bracket 1x1x1 angle strip)
- 1 x 2” axle rod
- 1 x No.59 collar with grub screw
- Meccano nuts and bolts or M4 x 6mm hex bolts and nuts.
Other Parts and Tools:
- 5/32” diameter x 3″ K&S brass tube for the axle (available from eBay or Eileen’s Emporium)
- Loctite 638
- 2 x 2mm screws to attach the motor
- 2 x 2mm screws to attach the mechanism to the turntable base.
- 1.6mm twist drill (threading drill for M2 taps)
- 2mm tap to prepare the motor for fitting and to prepare the standard brackets to accept M2 screws.
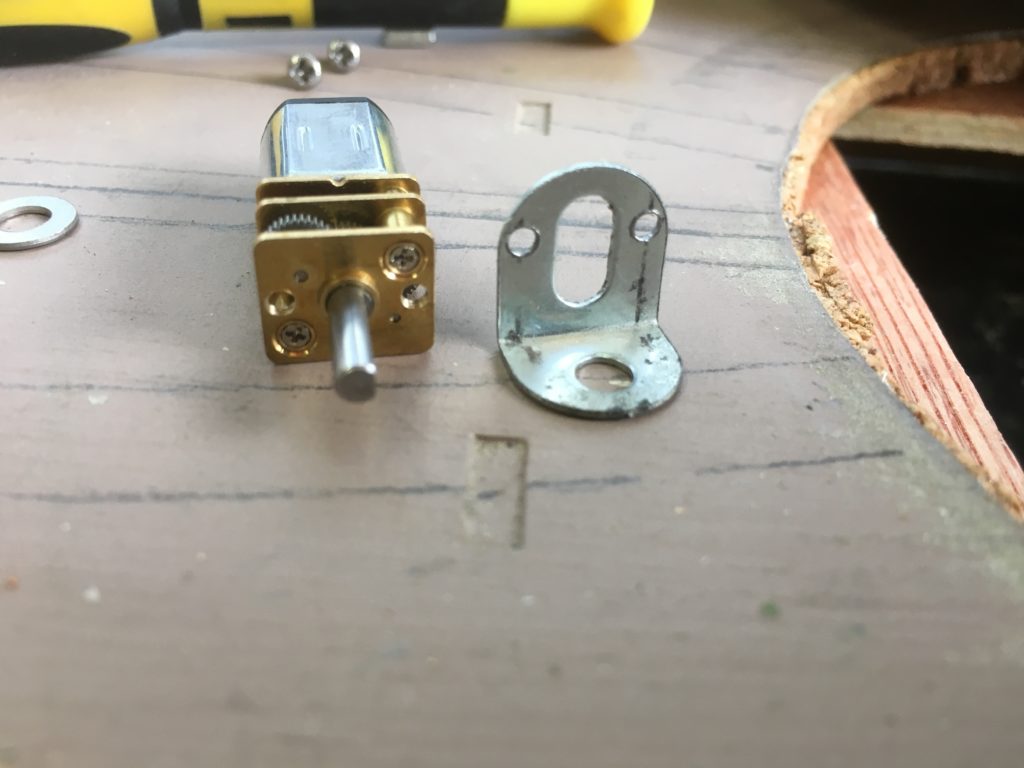
- 6Vdc 40 rpm KPA geared motor
Construction:
The geared motor has pilot holes on the faceplate and these need opening out to 1.6mm diameter before being tapped M2. The Meccano bracket needs two 3mm holes added to permit it to be screwed to the motor using M2 x 5mm screws.
The mechanism was assembled using M4 x 6mm stainless steel bolts and nuts so that they can be tightened more than Meccano screws and nuts. This is not essential but more of a ‘belt & braces’ approach on my part.
The following pictures show how the parts were assembled.
Top View

Side View
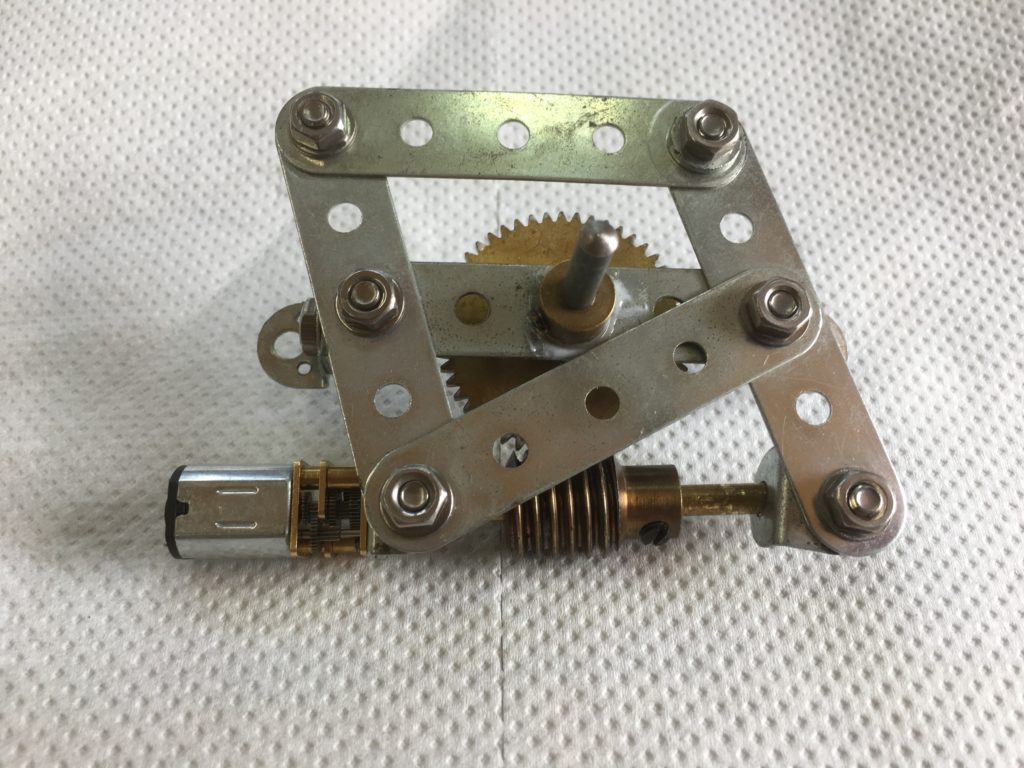
Bottom View
Side View
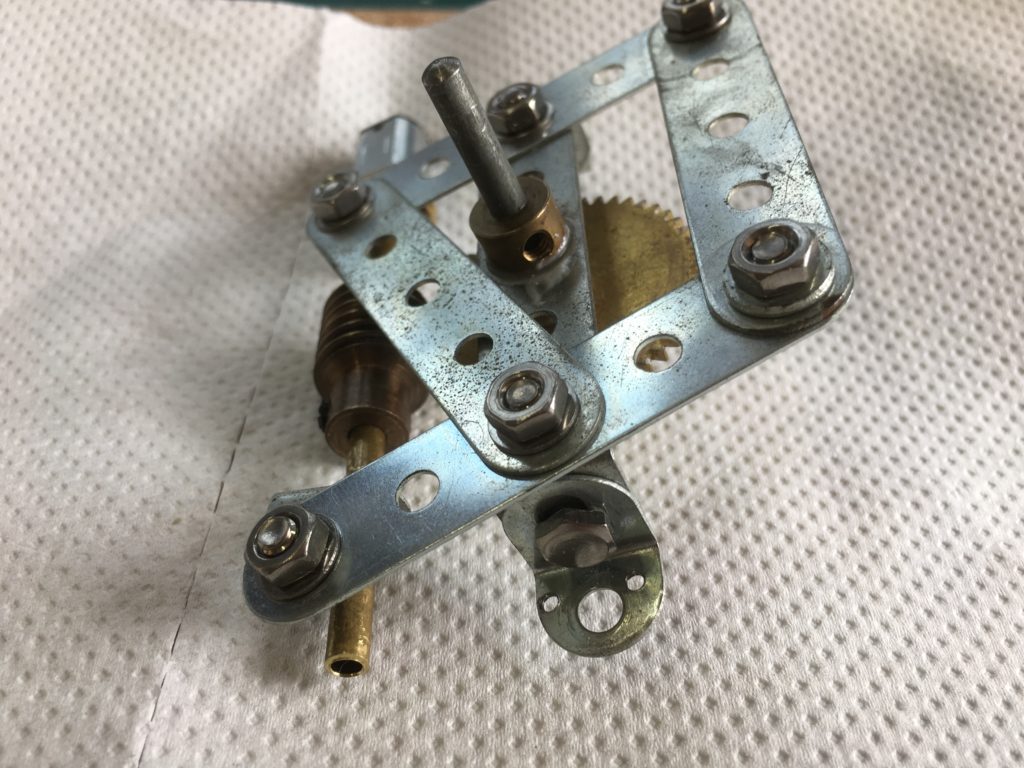
Showing the M2 threaded mounting bracket

The motorising unit fastened under the Peco LM-55 turntable base using M2 screws
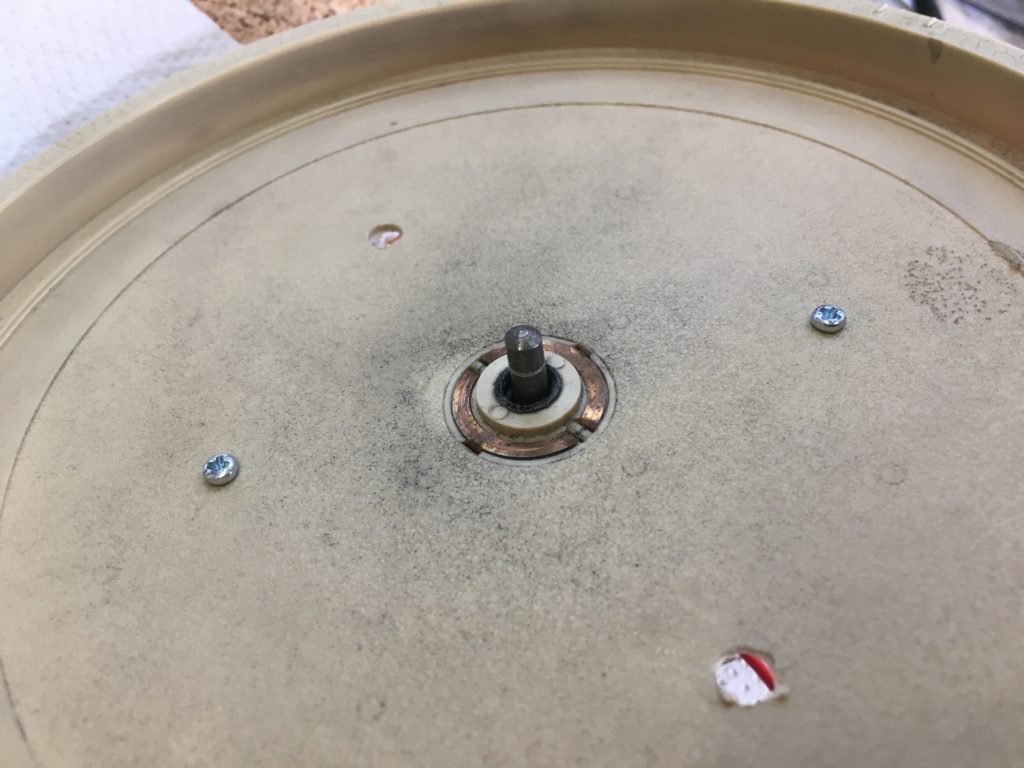
The M2 screw heads will be countersunk on the ‘production’ version to allow the bridge to rotate easily.
This geometry of the Meccano strips allowed for a small amount of ‘play’ that can be used to get the correct mesh between the worm and gear to minimise backlash and to ensure the shaft is vertical through the turntable base. Rotating the axle bracket, as well as centering the worm on the gearwheel, fine tunes the meshing. When all is meshed correctly the nuts were tightened to maintain the setting.
The 5/32” brass tube acts as an axle for the worm and is just glued over the D-shaped motor shaft using Loctite 638, the gearbox shaft being a good fit into the 5/32″ tube. Before gluing the axle tube in place a small amount of white grease was applied to the exit of gearbox shaft to prevent any Loctite penetrating into the gearbox bearing and seizing the mechanism. A light lubrication using white bgrease was done of all bearing surfaces.
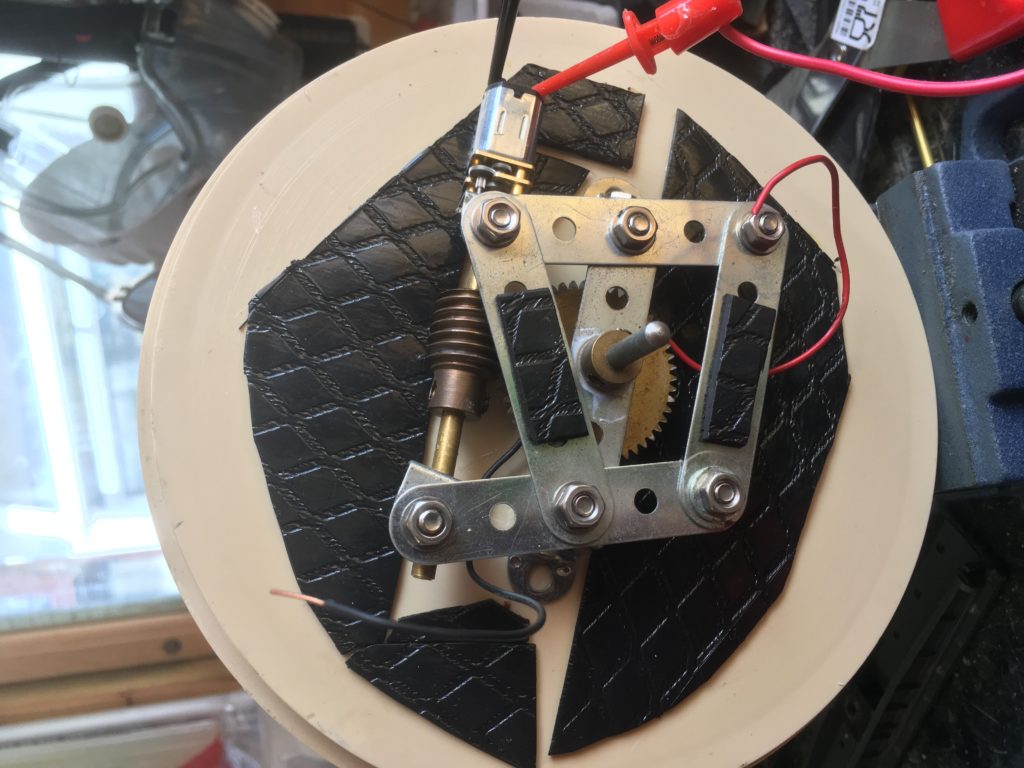
M2 screws were used to fasten the mechanism to the turntable base. They are screwed into the M2 threaded holes prepared earlier in the brackets.
Using a stabilsed DC power supply the motor, at 6Vdc, its maximum rated voltage, uses 0.03 amps and rotates the turntable at 3.6 degrees/second. No discernable heating of the motor was observed.
The final installation on a Valdieu-Lutran will use a new turntable kit and will have the motor controlled by a locomotive DCC decoder set to give a prototypical maximum rotation speed of 180 degrees a minute.
Addendum
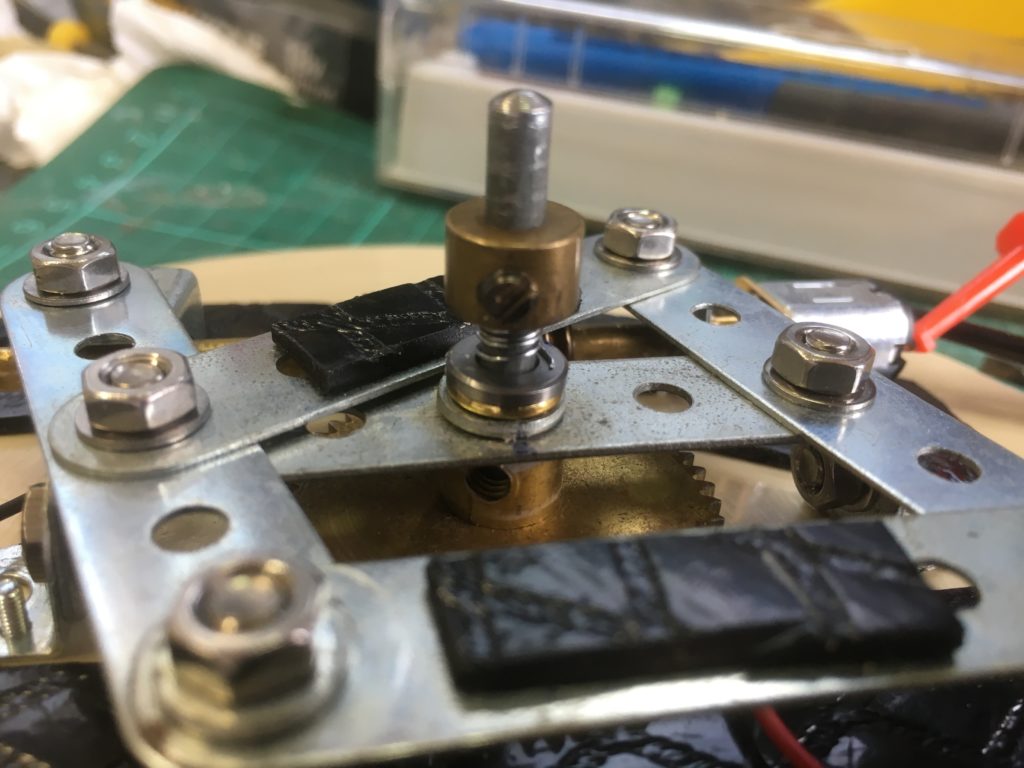
The motorising unit was very quiet on the test bench when not connected to the turntable. Once it was fitted to the turntable it became very noisy due to the thin plastic of the turntable base resonating. I measured the sound levels (dB Z weighted) as being over 60dB, equivalent to hearing conversations in a restaurant. I thefore ‘scrounged’ an offcut of self-adhesive sound deadening material used in car repairs from my local car repair shop. This was cut up to fit around the motorising unit and to clear the mounting supports on the baseboard. The sound levels were reduced to 50dB, a quarter of the original levels and equivalent to a quiet conversation at home. Though not a perfect solution it is still a significant reduction in the turntable resonance.
Addendum 2
I wanted to design the turntable able to overcome the design problem with Peco turntable kits. In the kit the turntable deck passes through the base and is secured by a collar that has to be glued into place below the base, and this must be done whilst compressing the deck against base so that the two sprung brass contact pins are compressed to make a good contact with the phosphor bronze electrical tracks in the base. Get this procedure wrong and you have a useless turntable because the deck will not make a reliable electrical contact with the base.
I have therefore modified my turntable motorising system so that the Meccano 2” shaft that will be glued into place in the deck will be sprung downwards when in place, ensuring a good contact between deck and base contacts, even if there is a slight misalignment of the deck.
To enable this I have purchased a 5/32” ball thrust bearing from eBay for £2.50 and used the spring from an obsolete ball pen.